 Save
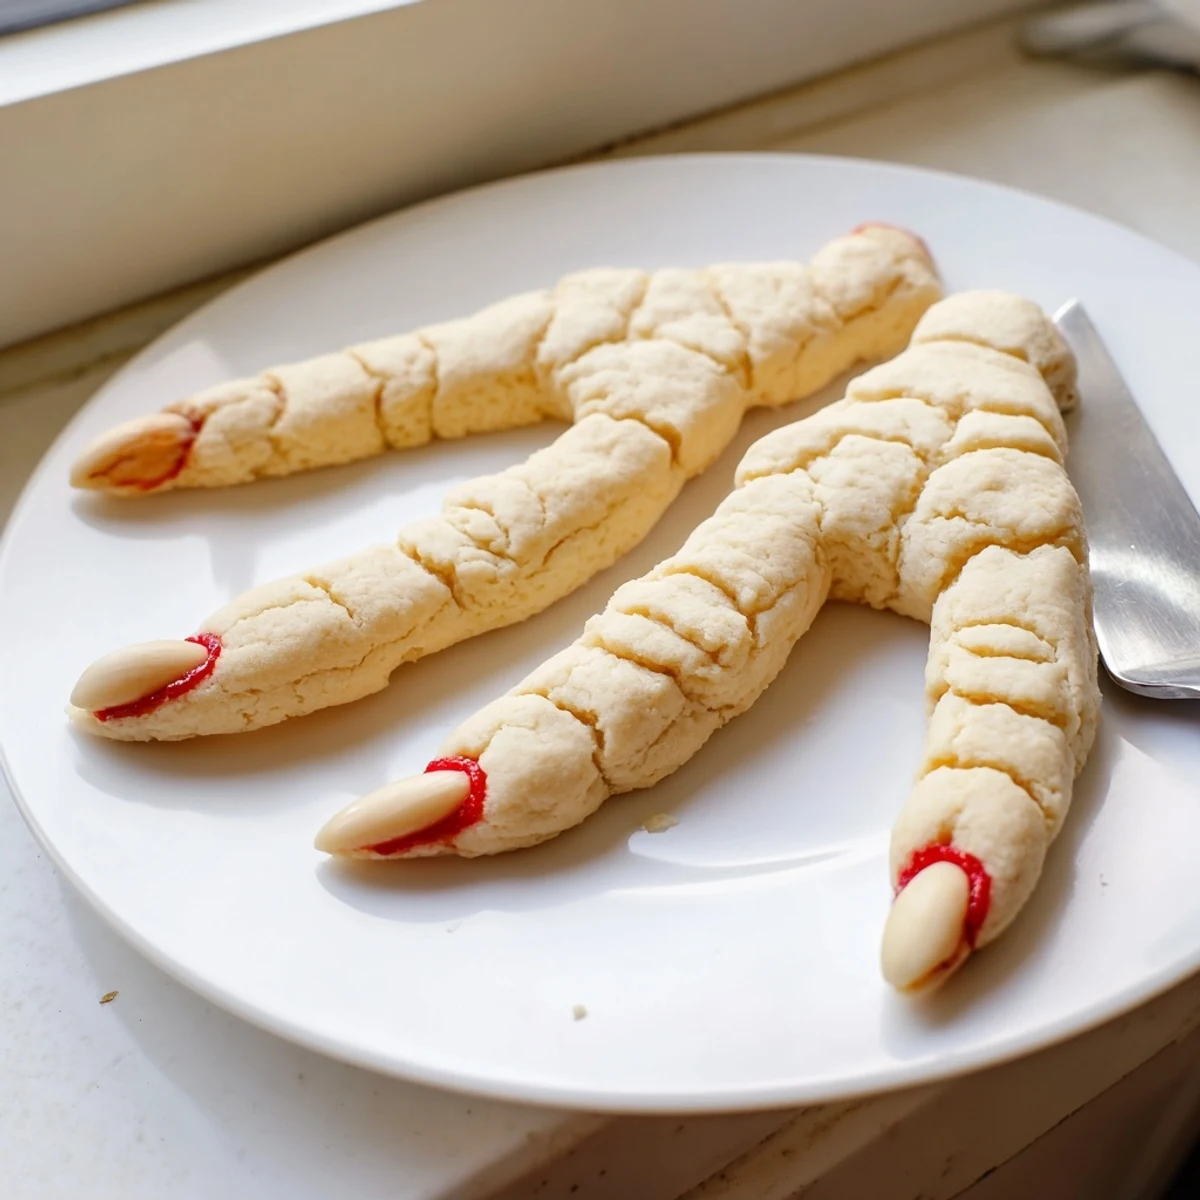
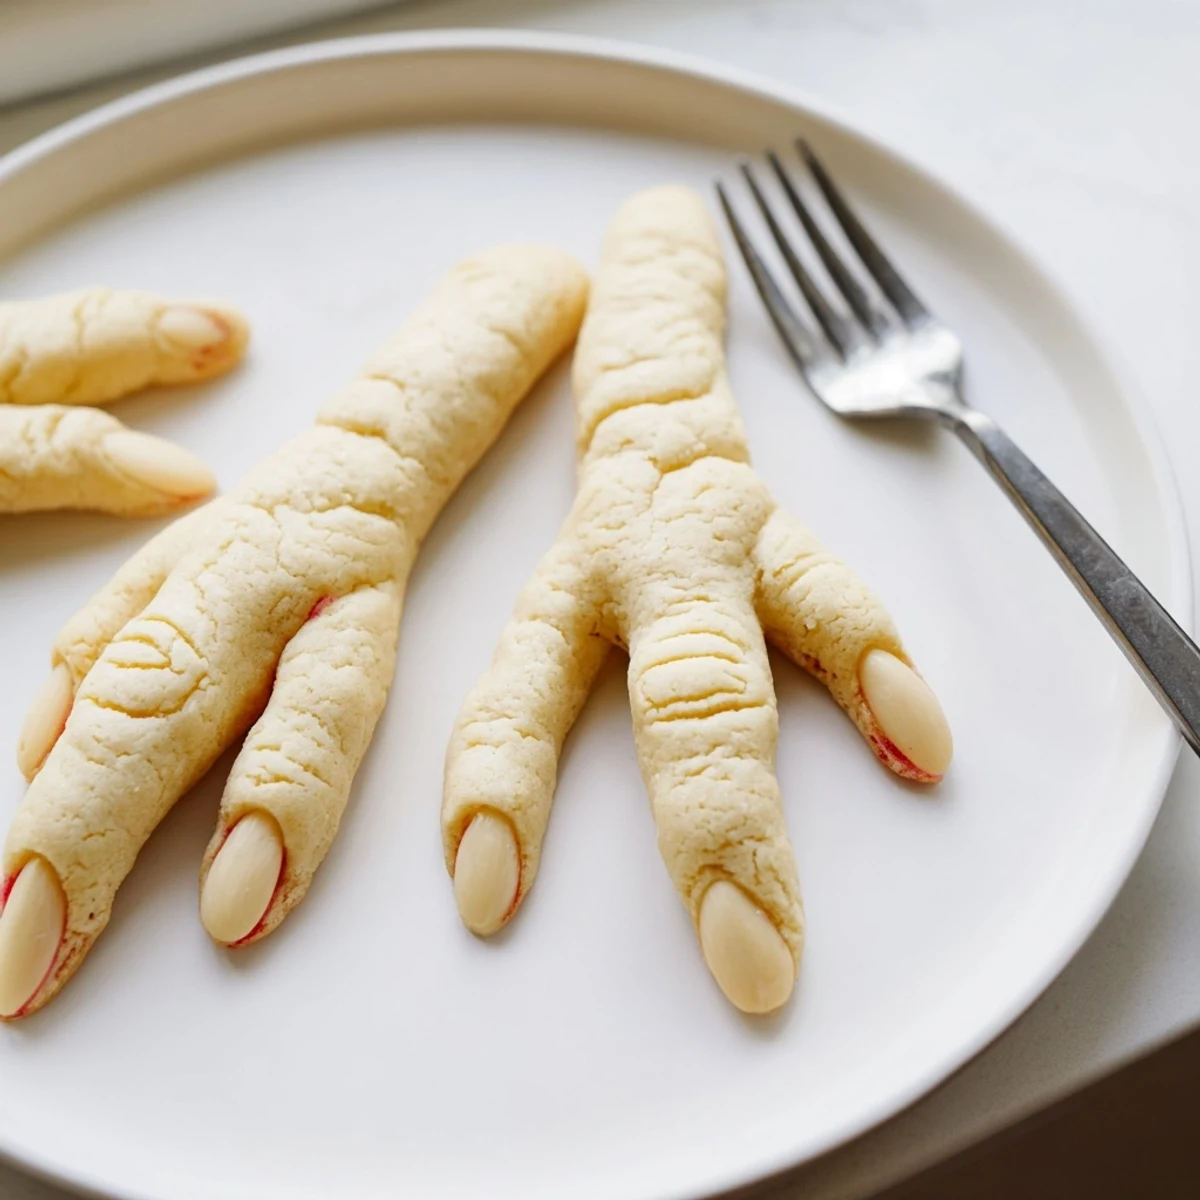
Save These creepy witch finger cookies combine buttery almond flavor with spooky Halloween aesthetics. The dough is shaped into realistic fingers, complete with knuckle lines and almond fingernails. A bloody effect using red food coloring or jam adds the perfect frightening touch for your haunted gathering.
Each cookie delivers crisp, tender texture with subtle vanilla and almond notes. The simple vanilla-almond dough comes together quickly and bakes in just 20 minutes. These spooky treats are guaranteed conversation starters at any Halloween party.
Perfect for serving with hot cider or spooky cocktails, these witch fingers strike the ideal balance between creepy presentation and delicious taste. Kids and adults alike will enjoy the frightfully fun presentation while savoring the buttery, nutty flavor.
Last October, my niece looked at the tray of cookies I brought to her Halloween party and actually gasped. She hesitated, then picked one up, examined the knuckle details I had painstakingly carved, and took a tiny bite. Those moments of watching someone discover that these creepy witch fingers are actually delicious butter almond cookies never get old.
I learned the hard way that making these for a preschool Halloween party requires some discretion. One concerned parent actually pulled me aside to ask why I was serving severed fingers to three year olds. We all had a good laugh, but now I keep them for adult gatherings or make them slightly less realistic for younger crowds.
Ingredients
- Unsalted butter: Room temperature butter creates the perfect texture for rolling and shaping without sticking to your hands
- Granulated sugar: Cream this thoroughly with the butter until the mixture looks pale and fluffy for maximum tenderness
- Large egg: Bring this to room temperature too so it incorporates smoothly without curdling the butter mixture
- Vanilla and almond extracts: The almond extract is essential here it gives that classic bakery flavor that pairs perfectly with the almond nails
- All purpose flour: Measure this properly by spooning and leveling for consistent results every time
- Baking powder and salt: These work together to give the cookies just enough lift without losing their finger shape in the oven
- Whole blanched almonds: Look for whole unbroken almonds and handle them gently when pressing them into the dough
- Red gel food coloring or strawberry jam: Gel coloring creates that authentic fresh blood look but strawberry jam adds a sweet sticky realism
Instructions
- Prep your space:
- Preheat that oven to 325°F and line two baking sheets with parchment paper so you are ready to pop these fingers in immediately after shaping
- Cream the butter and sugar:
- Beat the softened butter and sugar together until the mixture is pale and fluffy, which usually takes about 3 minutes of serious mixing
- Add the wet ingredients:
- Crack in the egg and pour in both extracts, beating until everything is completely combined and the mixture looks glossy
- Whisk the dry ingredients:
- In a separate bowl, combine the flour, baking powder, and salt so they distribute evenly throughout the dough
- Combine everything:
- Gradually add the dry ingredients to the butter mixture, mixing just until a dough forms and you cannot see any more white flour streaks
- Shape the fingers:
- Scoop about one tablespoon of dough and roll it between your palms into a finger shape, about 3 to 4 inches long, making one end slightly wider than the other
- Add the gory details:
- Use a knife to gently create knuckle lines by pressing shallow indentations across the wider part of the finger, then press a blanched almond firmly into the tapered end
- Bake until golden:
- Arrange the fingers on your prepared baking sheets with 2 inches of space between them and bake for 18 to 20 minutes until they are lightly golden on the edges
- Create the bloody effect:
- Carefully remove each almond, apply a tiny drop of red food coloring or strawberry jam to the nail bed, and press the almond back into place
- Cool completely:
- Let these cool completely on a wire rack so the jam sets and the almonds stay securely in place
 Save
Save My sister still talks about the year I brought these to our annual horror movie marathon. Everyone was too impressed by the detail to actually eat them at first. Once someone finally took a bite and declared them amazing, the whole platter vanished before the second movie even started.
Making Them Extra Creepy
You can tint portions of the dough with green or gray food coloring to create zombie or witch fingers that look even more realistic. Just add a tiny amount of gel coloring to the dough after it is formed and knead it until the color is evenly distributed.
Flavor Variations
If almond is not your favorite flavor, the almond extract can be replaced with lemon extract or omitted entirely for a classic vanilla butter cookie that is just as spooky. The base dough is incredibly versatile and takes flavor additions beautifully.
Serving Suggestions
These cookies shine when served alongside hot apple cider or placed on a platter with other spooky treats like chocolate spider webs or graveyard dirt pudding. The contrast between the creepy appearance and delicious flavor creates the perfect party moment.
- Arrange the fingers pointing outward on a dark serving platter for maximum dramatic effect
- Pair with bloody mocktails or dark berry cocktails for a complete themed experience
- Make a double batch because these disappear faster than you expect at parties
 Save
Save There is something deeply satisfying about serving food that makes people gasp and then smile. These witch finger cookies have become my most requested Halloween recipe, and honestly, I love making them almost as much as I love watching people discover what they really are.
Questions & Answers
- → How far ahead can I make these witch finger cookies?
-
You can prepare the dough up to 2 days in advance and store it refrigerated. Shape and bake when ready. Once baked, they stay fresh for 4-5 days in an airtight container.
- → Can I freeze the dough or baked cookies?
-
Yes! Freeze shaped, unbaked fingers on a tray until firm, then transfer to a freezer bag for up to 3 months. Bake from frozen, adding 2-3 minutes. Baked cookies freeze well for 2 months.
- → What can I use instead of almonds for the fingernails?
-
Peeled pistachios work beautifully for greenish witch fingers. For nut-free options, try candy melts, white chocolate chips, or even sliced cashews pressed into the dough.
- → How do I get the most realistic bloody effect?
-
Strawberry or raspberry jam creates the most realistic, glossy blood effect. Warm slightly for easier application. Red gel food coloring works too but appears more artificial than fruit jam.
- → Can I make these cookies gluten-free?
-
Substitute the all-purpose flour with a 1:1 gluten-free baking blend. Xanthan gum in the blend helps maintain structure. The texture will be slightly denser but still delicious.
- → What's the best way to create knuckle details?
-
Use a small paring knife to make shallow horizontal cuts across the dough fingers before baking. Don't cut too deep — just enough to create visible knuckle lines that bake into permanent creases.
