 Save
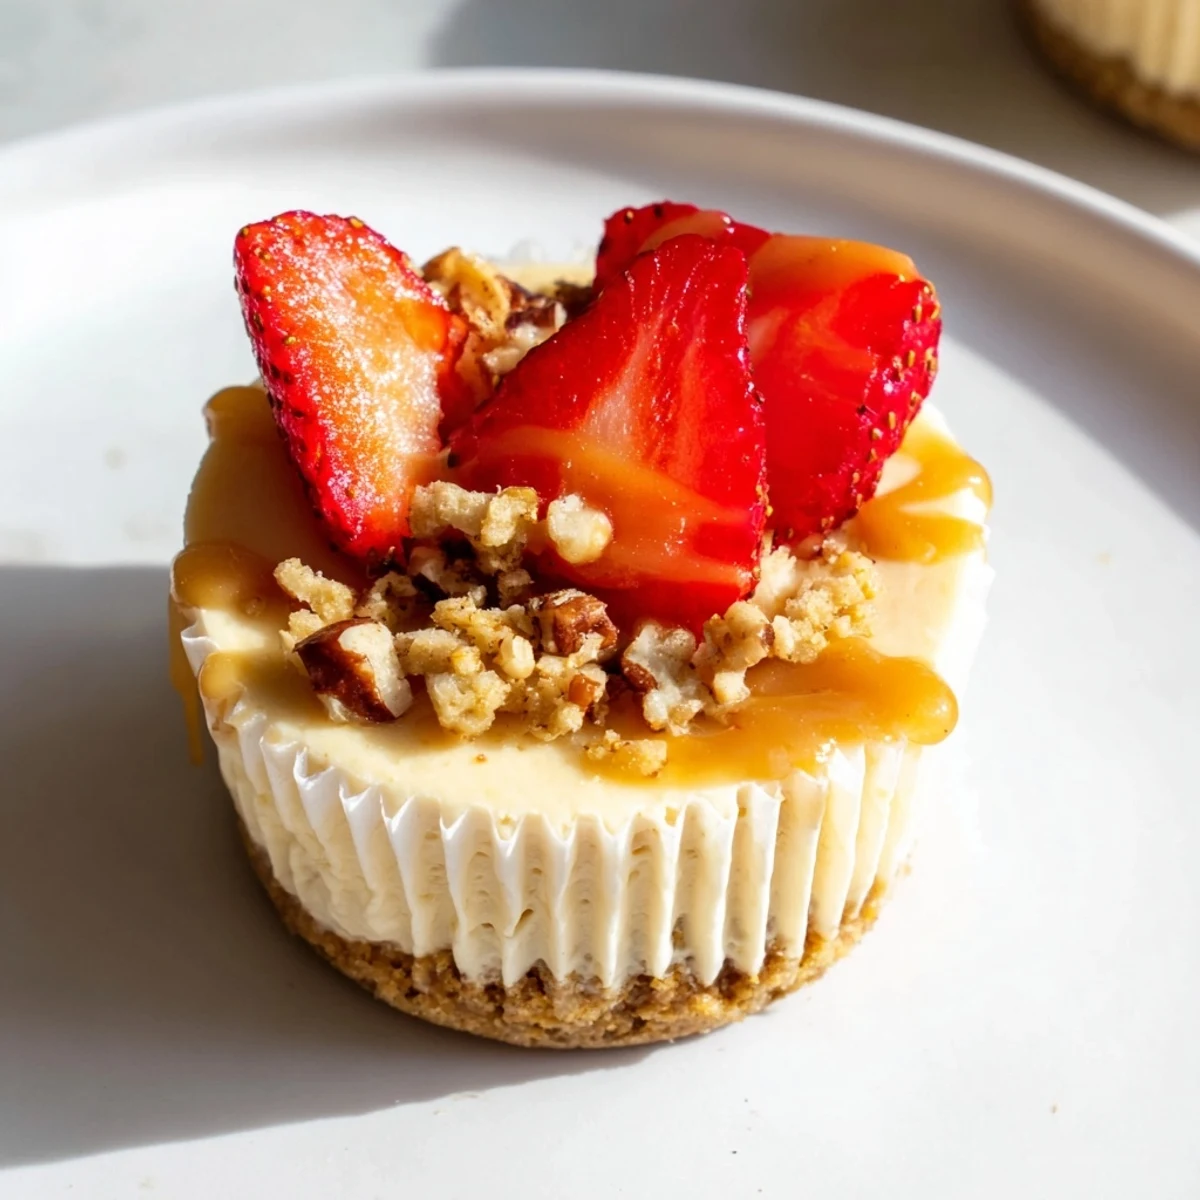
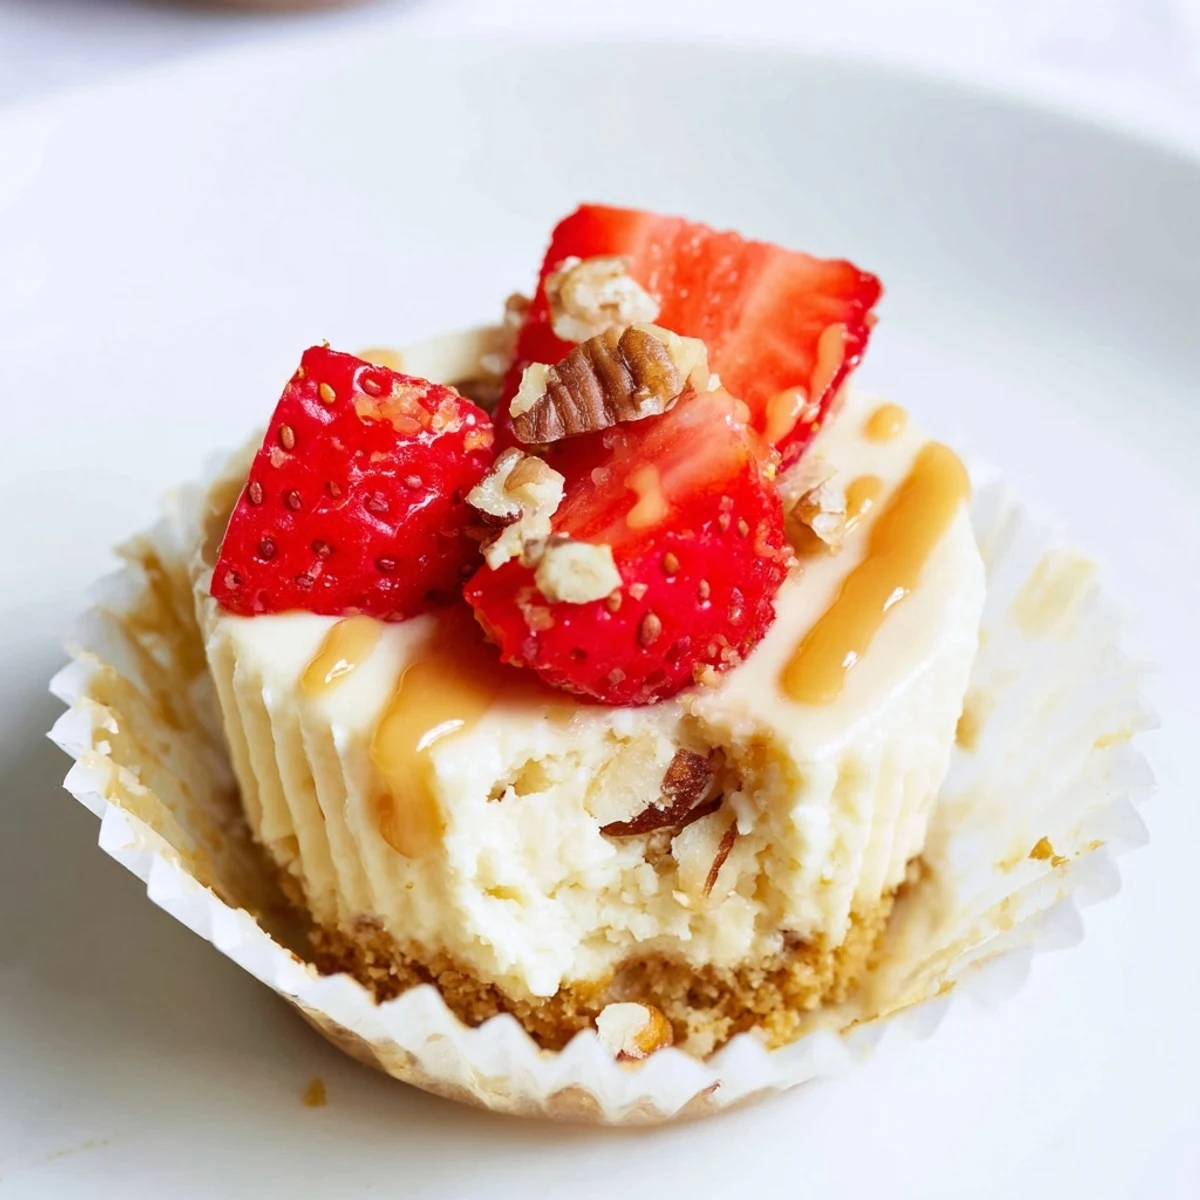
Save These individual mini cheesecakes feature a buttery graham cracker crust topped with a rich, creamy filling made from cream cheese, sour cream, and vanilla. Each bite-sized portion bakes in a standard muffin tin, making them easy to prepare and serve at any gathering.
The real charm lies in the customizable toppings — from fresh berries and lemon curd to melted chocolate and caramel sauce. Guests can personalize their own, turning dessert into an interactive experience. They require no special equipment beyond a muffin tin and mix together in just 20 minutes before baking.
My sister showed up to Thanksgiving with a tray of these mini cheesecakes, and I spent the entire evening pretending I was not plotting how to smuggle the last three home in my purse.
I made a double batch for a friends potluck and watched people actually skip the main course just to stake their claim on their favorite flavors.
Ingredients
- Graham cracker crumbs (1 cup): The backbone of every great crust, and finely crushed crumbs give you the most even base.
- Unsalted butter, melted (1/4 cup): Binds the crumbs together, and using unsalted lets you control the flavor completely.
- Sugar (2 tbsp): Just enough sweetness in the crust to balance the buttery graham flavor.
- Cream cheese, softened (12 oz): The star of the filling, and it must be properly softened or you will chase lumps around your bowl forever.
- Granulated sugar (1/2 cup): Sweetens the filling without making it cloying.
- Large egg (1): Gives the cheesecake its silky set, and mixing until just combined keeps the texture dense and creamy rather than airy.
- Vanilla extract (1 tsp): Rounds out all the dairy richness with its warm fragrance.
- Sour cream (1/2 cup): The secret ingredient that adds a slight tang and an incredibly smooth mouthfeel.
- Toppings of your choice: Fresh berries, lemon curd, melted chocolate, caramel sauce, chopped nuts, crushed cookies, or fruit preserves all work beautifully here.
Instructions
- Prep your pan and oven:
- Preheat the oven to 160 degrees C (325 degrees F) and line a 12 cup muffin tin with paper liners so nothing sticks.
- Build the crust:
- Stir the graham crumbs, melted butter, and sugar together until the mixture looks like damp sand, then press a spoonful firmly into each liner.
- Whip the filling:
- Beat the cream cheese and sugar until completely smooth with no streaks, then blend in the egg and vanilla just until incorporated before gently folding in the sour cream.
- Fill and smooth:
- Spoon the batter evenly over each crust and use a small spatula or the back of a spoon to coax the tops flat.
- Bake until set:
- Bake for 18 to 20 minutes until the edges look firm but the centers still have a gentle wobble when you nudge the pan.
- Cool gradually:
- Let them sit in the pan for 15 minutes so the sudden temperature change does not crack them, then move to a wire rack.
- Chill thoroughly:
- Refrigerate for at least one full hour until the filling is cold and set to a perfect sliceable consistency.
- Top and serve:
- Now comes the fun part: pile on whatever toppings your heart desires and watch them disappear.
 Save
Save One snowy afternoon my neighbor knocked on my door holding a container of fresh raspberries from the market, and we spent the next hour decorating a batch together while the radio played in the background.
Playing With Different Crusts
Graham crackers are classic, but I encourage you to try chocolate cookie crumbs or crushed gingersnaps when you want to shake things up. Each base brings its own personality to the dessert and pairs differently with your toppings.
Creating a Marbled Look
Drop a small spoonful of fruit puree or melted chocolate onto each filled cup and drag a toothpick through it in gentle swirls. It takes about ten extra seconds and makes each cheesecake look like it came from a bakery case.
Making Ahead and Storing
These mini cheesecakes freeze brilliantly without any toppings, which means you can make them a week ahead and simply thaw them overnight in the refrigerator before your event.
- Wrap each cooled cheesecake individually in plastic before freezing so they do not pick up off flavors.
- Add all toppings right before serving so nothing gets soggy or slides off.
- Always check labels on your crust cookies and toppings if you are serving guests with allergies.
 Save
Save Once you see how easily these come together, you will start finding excuses to make them for every occasion from birthdays to random Tuesday nights.
Questions & Answers
- → How long do mini cheesecakes need to chill before serving?
-
Mini cheesecakes should chill in the refrigerator for at least 1 hour after cooling to room temperature. This resting time allows the filling to set properly and develop its signature creamy, dense texture. For even better results, chill them for 2 to 4 hours or overnight.
- → Can I freeze mini cheesecakes ahead of time?
-
Yes, mini cheesecakes freeze exceptionally well. Place them in an airtight container and freeze for up to 2 months. Thaw overnight in the refrigerator, then add your fresh toppings just before serving for the best texture and presentation.
- → What can I use instead of graham crackers for the crust?
-
You can swap graham crackers for crushed chocolate cookies, ginger snaps, vanilla wafers, or even pretzels for a salty-sweet twist. Any crunchy cookie or biscuit base works well — just keep the same ratio of crumbs to melted butter for a crust that holds together firmly.
- → How do I know when mini cheesecakes are done baking?
-
The centers should appear set but still have a slight jiggle when you gently shake the muffin tin. This typically takes 18 to 20 minutes at 160°C (325°F). They will continue to firm up as they cool. Overbaking leads to cracks and a dry texture.
- → What toppings pair best with these mini cheesecakes?
-
Fresh berries like strawberries, blueberries, and raspberries are classic pairings that balance the richness. Lemon curd adds bright acidity, while melted chocolate or caramel sauce brings indulgent sweetness. Chopped nuts provide crunch, and crushed cookies add texture contrast.
- → Can I make these mini cheesecakes without an electric mixer?
-
Absolutely. A whisk and some elbow work will get the cream cheese smooth enough, though it takes a bit more effort. Make sure your cream cheese is fully softened at room temperature before beating — this makes hand-mixing much easier and ensures a lump-free filling.
