 Save
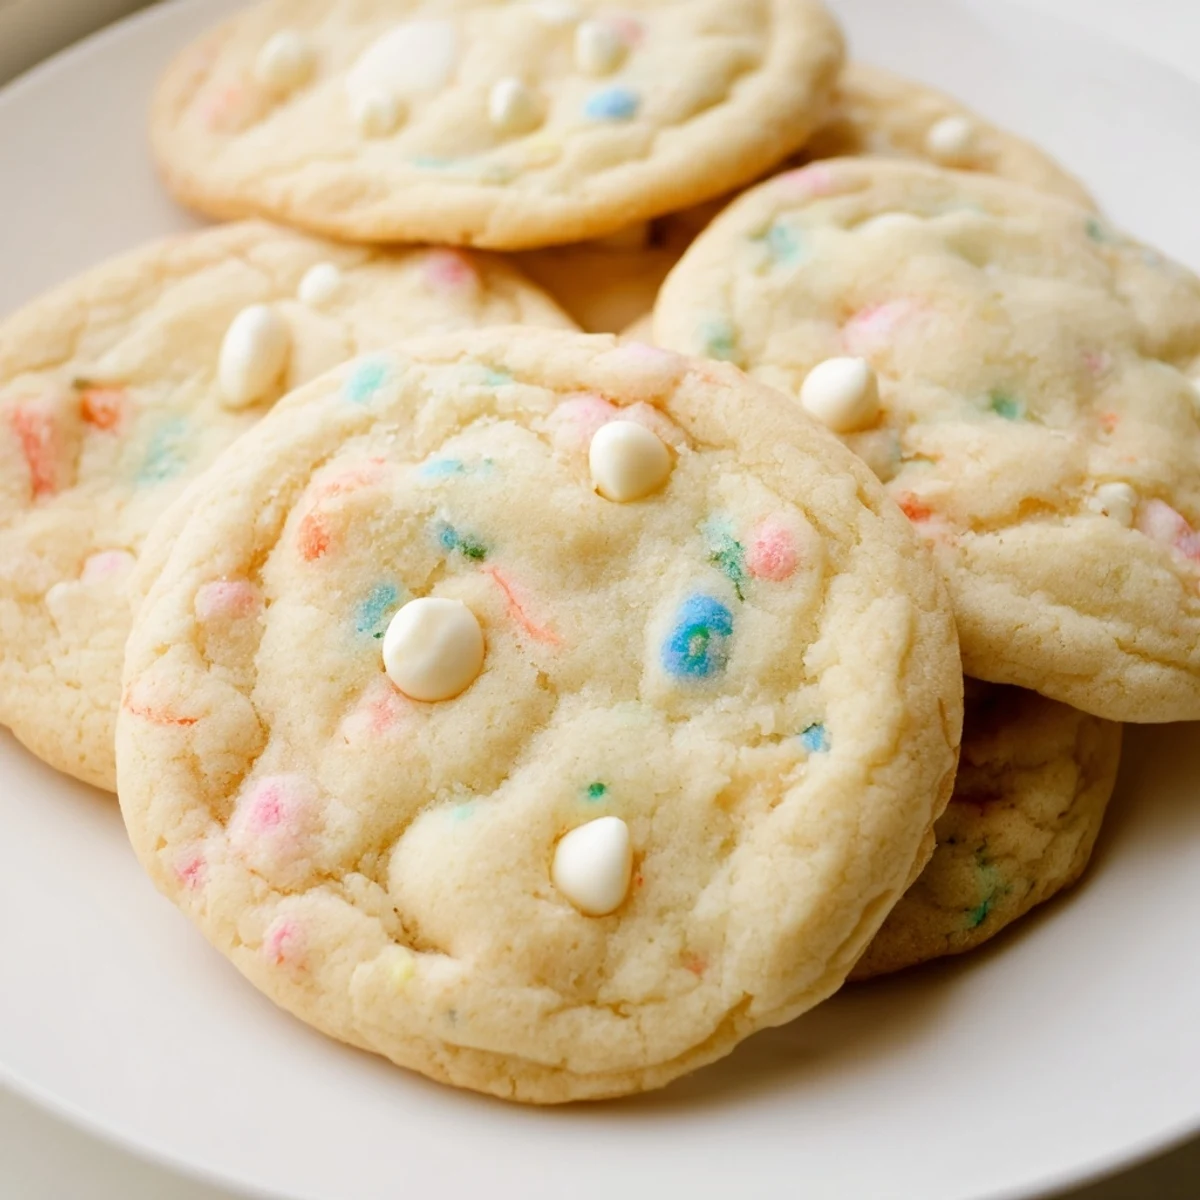
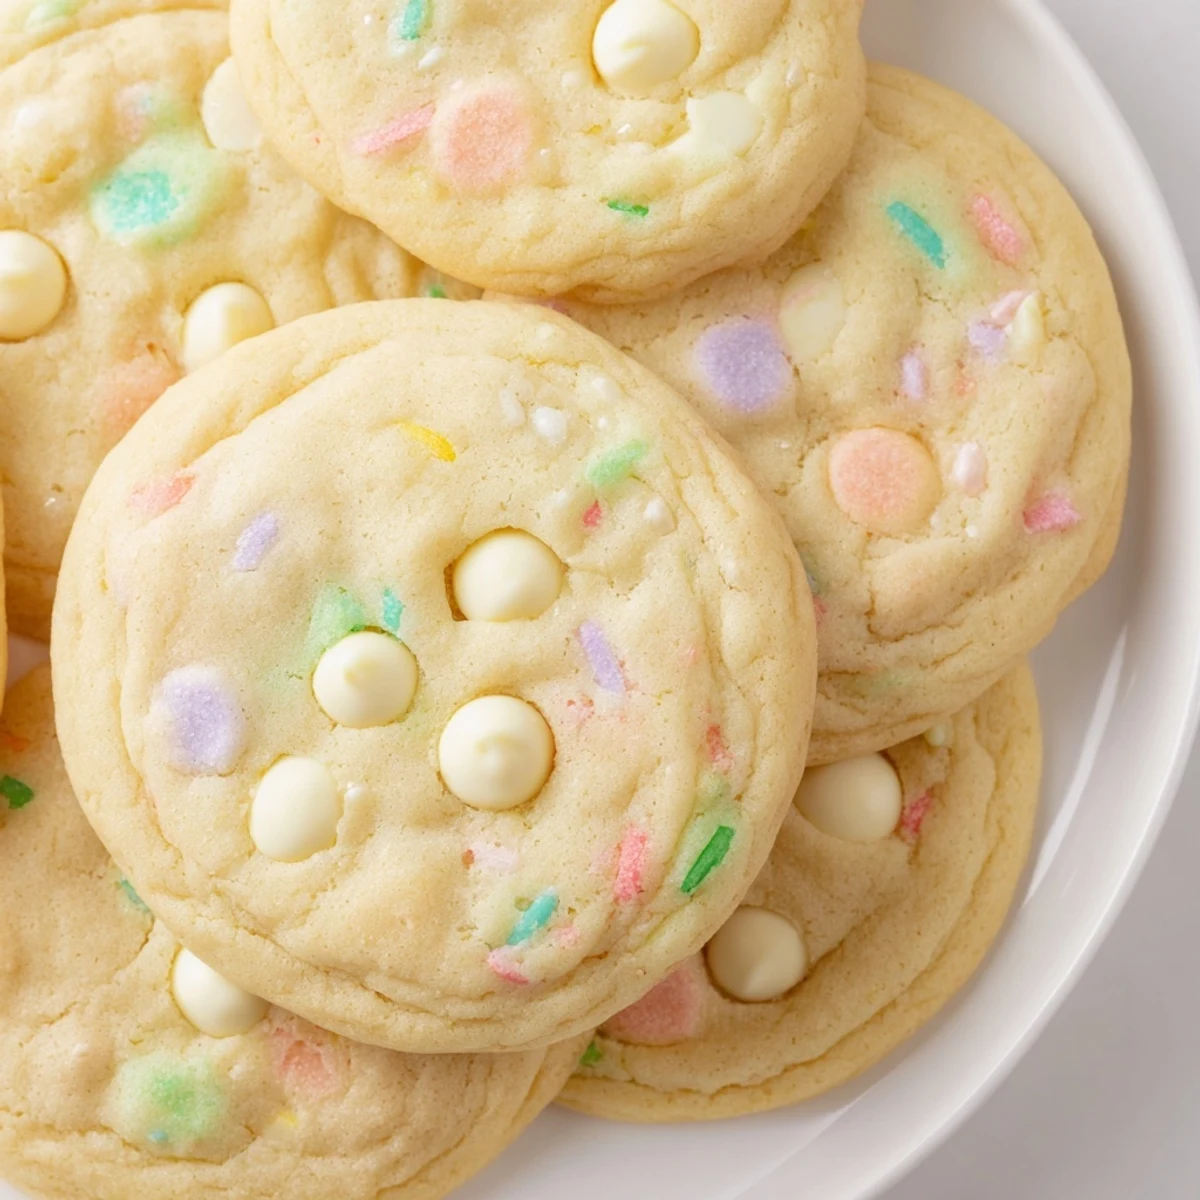
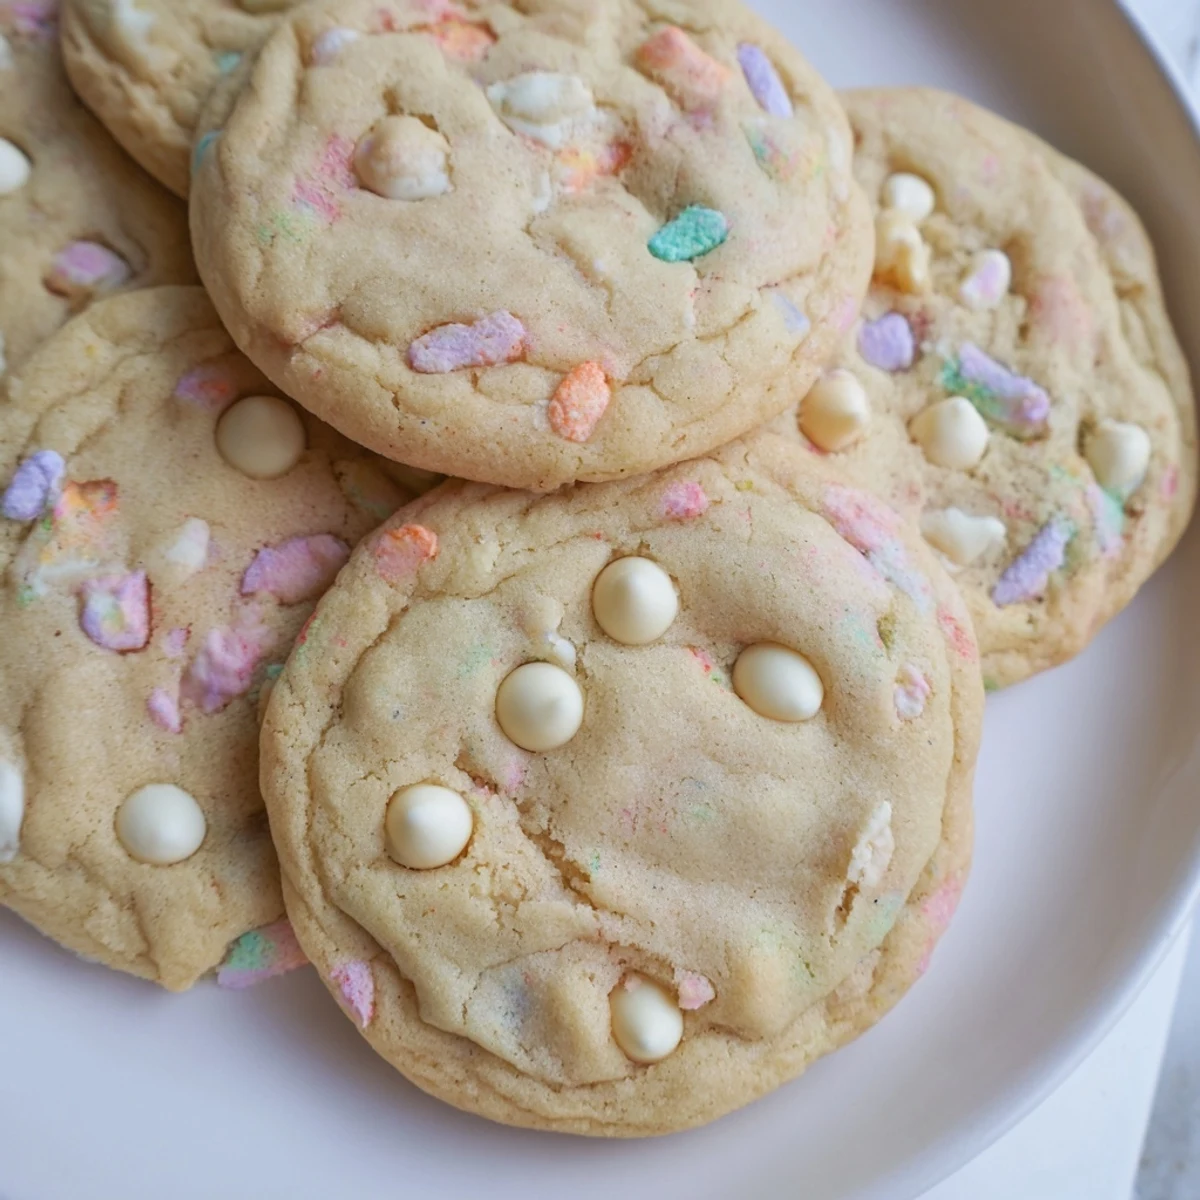
Save These soft, buttery cookies combine creamy white chocolate chips with festive pastel sprinkles for a delightful treat that's perfect for any celebration. The dough comes together quickly with basic pantry ingredients, and the finished cookies feature lightly golden edges with soft, tender centers.
Each bite delivers the rich sweetness of white chocolate balanced by a buttery vanilla base, while the sprinkles add fun color and a subtle crunch. The 27-minute total time includes just 15 minutes of prep work, making these ideal for busy bakers or last-minute gathering contributions.
Customize the sprinkle colors to match holidays—pastels for Easter, red and green for Christmas, or choose colors to coordinate with birthday themes. These store beautifully for up to five days in an airtight container, though their irresistible flavor means they rarely last that long.
The first time I made these pastel white chocolate cookies was for my daughter's spring birthday party. I'd seen them floating around social media and thought, how hard could it be? Well, I learned quickly that sprinkles can bleed into your dough if you're not careful, turning your beautiful pastel dreams into a murky gray situation. After a few attempts and some colorful experiments, I finally nailed the technique. Now they're the most requested treat in our house, bringing a little joy to ordinary Tuesdays and special celebrations alike.
Last Easter, my niece accidentally knocked over the entire container of sprinkles while helping me bake. We both stood there stunned, staring at a carpet of colorful dots covering half the kitchen floor. Instead of cleaning it up immediately, we grabbed handfuls and started throwing them at each other, laughing until our sides hurt. Those cookies turned out slightly less colorful than planned, but the memory became something we still talk about every holiday season.
Ingredients
- 2 1/4 cups all-purpose flour: I've learned that spooning and leveling your flour instead of scooping directly prevents dense cookies
- 1/2 teaspoon baking soda: This tiny amount is exactly what gives these cookies their perfect lift and spread
- 1/2 teaspoon salt: Don't skip this, it balances the sweetness and makes all the flavors pop
- 1 cup unsalted butter softened: Room temperature butter creates the best texture, so set it out about an hour before baking
- 3/4 cup granulated sugar: This creates those irresistible crispy edges everyone fights over
- 3/4 cup light brown sugar packed: The molasses in brown sugar keeps the centers soft and chewy for days
- 2 large eggs: I always use room temperature eggs for better incorporation into the dough
- 2 teaspoons pure vanilla extract: Real vanilla makes a noticeable difference here, artificial just doesn't cut it
- 1 1/4 cups white chocolate chips: Ghirardelli has the best creamy consistency that melts beautifully
- 1/2 cup pastel colored sprinkles: Use jimmies not nonpareils, those tiny balls bleed color everywhere
Instructions
- Preheat your oven and prepare your baking space:
- Set your oven to 350 degrees F and line two baking sheets with parchment paper, this prevents sticking and makes cleanup a breeze
- Whisk together the dry ingredients:
- In a medium bowl, combine the flour, baking soda, and salt until well blended, then set it aside for later
- Cream the butter and sugars:
- Beat the softened butter with both sugars for about 2 to 3 minutes until it's light and fluffy, this step is crucial for texture
- Add the eggs and vanilla:
- Drop in the eggs one at a time, mixing thoroughly after each addition, then stir in the vanilla until everything is combined
- Combine everything:
- Gradually mix in the dry ingredients just until the flour disappears, overmixing makes tough cookies so stop as soon as it comes together
- Fold in the fun stuff:
- Gently fold in the white chocolate chips and sprinkles by hand, being careful not to overmix or the sprinkles will start bleeding color
- Scoop and space:
- Drop rounded tablespoons of dough onto your prepared baking sheets, leaving about 2 inches between each cookie for spreading
- Bake to perfection:
- Bake for 10 to 12 minutes until the edges are lightly golden, the centers should still look slightly underbaked and soft
- Cool completely:
- Let the cookies rest on the baking sheet for 5 minutes to set, then transfer them to a wire rack until completely cool
 Save
Save These cookies became my go-to comfort bake during a particularly difficult month when everything felt overwhelming. There was something so therapeutic about measuring ingredients, watching pastel colors scatter through white chocolate studded dough, and filling the kitchen with buttery sweetness. My roommate started coming home earlier on baking days, and we'd sit at the counter with warm cookies, talking about nothing and everything until the pan was empty.
Making Them Your Own
I love switching up the sprinkles for different occasions, red and green for Christmas, orange and black for Halloween, or just whatever catches my eye at the store. You can also press a few extra white chocolate chips into the tops before baking for that professional bakery look.
Storage Secrets
These cookies stay surprisingly soft stored in an airtight container at room temperature for up to five days, though they rarely last that long in my house. I've also frozen the raw dough balls and baked them straight from frozen, just add a couple extra minutes to the baking time.
Baking Troubleshooting
If your cookies spread too much, your butter might have been too soft or you may need to chill the dough before baking. Conversely, if they're too thick and cakey, you might have overmeasured the flour or creamed the butter and sugars too long.
- Room temperature ingredients really do make a noticeable difference in the final texture
- Don't be tempted to bake them until completely set in the center, they'll firm up as they cool
- If you only have salted butter, reduce the added salt to just a pinch
 Save
Save Whether you're baking for a celebration or just because Tuesday needs a little brightness, these pastel white chocolate cookies never fail to bring smiles. Life's too short for plain cookies when you can have ones that look like edible confetti.
Questions & Answers
- → Why should my cookie dough look underbaked?
-
The centers should appear soft when you remove the cookies from the oven. This is intentional—carryover heat completes the baking process as they cool on the pan for those essential five minutes, resulting in perfectly tender textures.
- → Can I prepare the dough ahead of time?
-
Absolutely. Scoop the dough onto baking sheets and freeze until solid, then transfer to an airtight bag. Bake from frozen, adding 1–2 minutes to the baking time. You can also refrigerate the dough for up to 48 hours before baking.
- → What makes white chocolate different from regular chocolate?
-
White chocolate contains cocoa butter, sugar, and milk solids but no cocoa solids, which gives it that creamy, vanilla-forward sweetness. It's technically not chocolate in the traditional sense, though it provides delicious melt-in-your-mouth results.
- → How do I prevent my sprinkles from bleeding into the dough?
-
Gently fold the sprinkles in at the very end to minimize color transfer. Using high-quality sprinkles specifically designed for baking also helps. Some color bleeding is natural and adds to the charming pastel appearance.
- → Can I substitute the white chocolate chips?
-
White chocolate chunks, chopped white chocolate bars, or even white chocolate drizzle pieces work beautifully. For different flavor profiles, try milk chocolate chips, dark chocolate chunks, or butterscotch chips instead.
