 Save
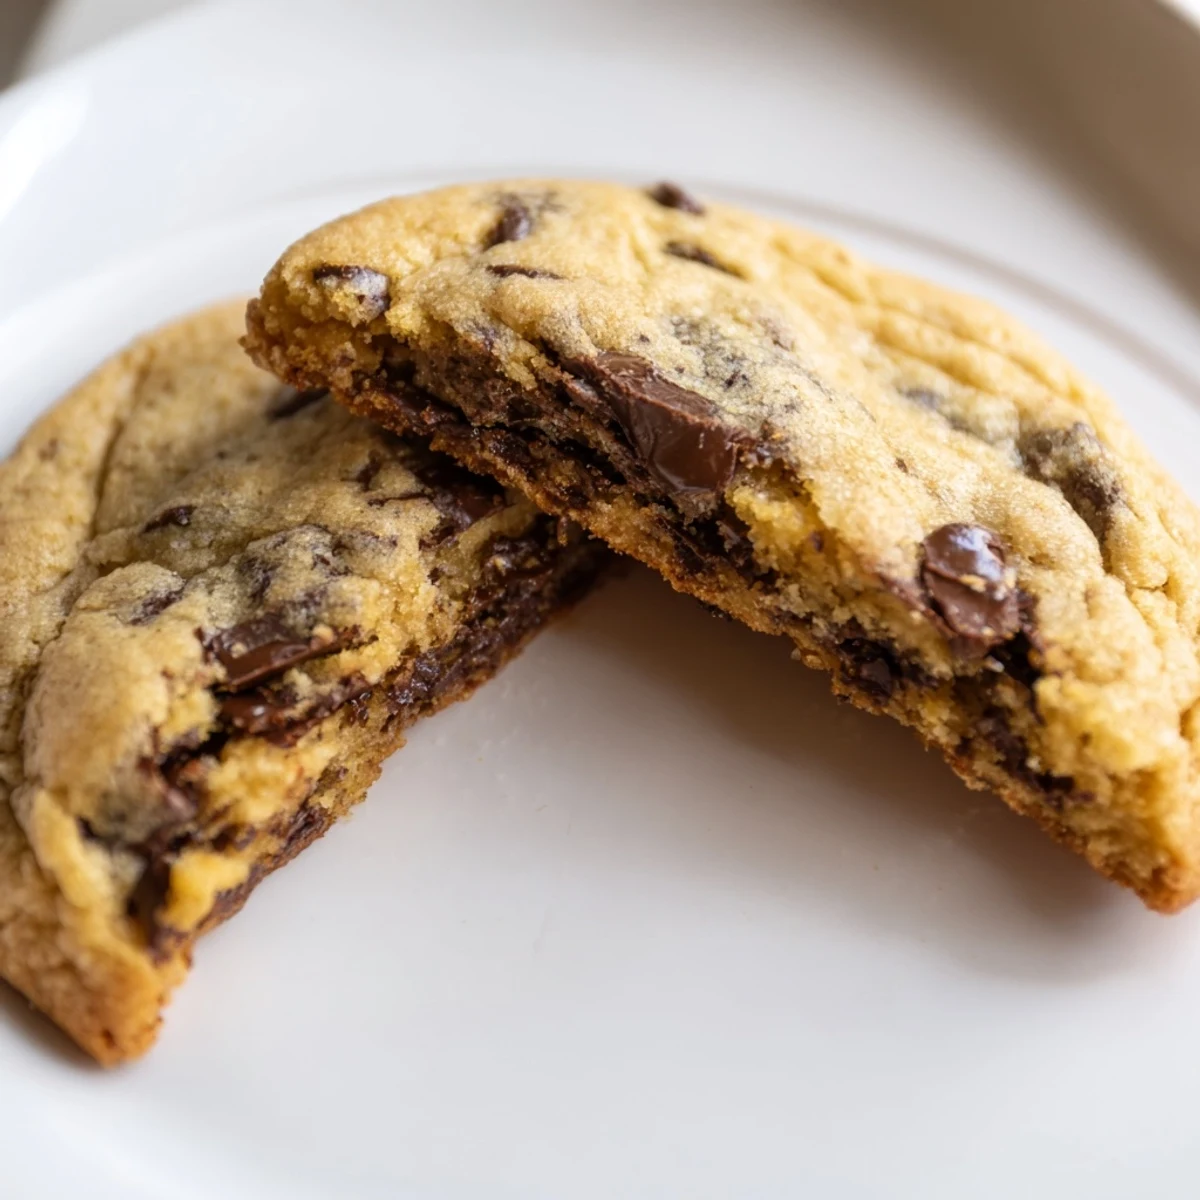
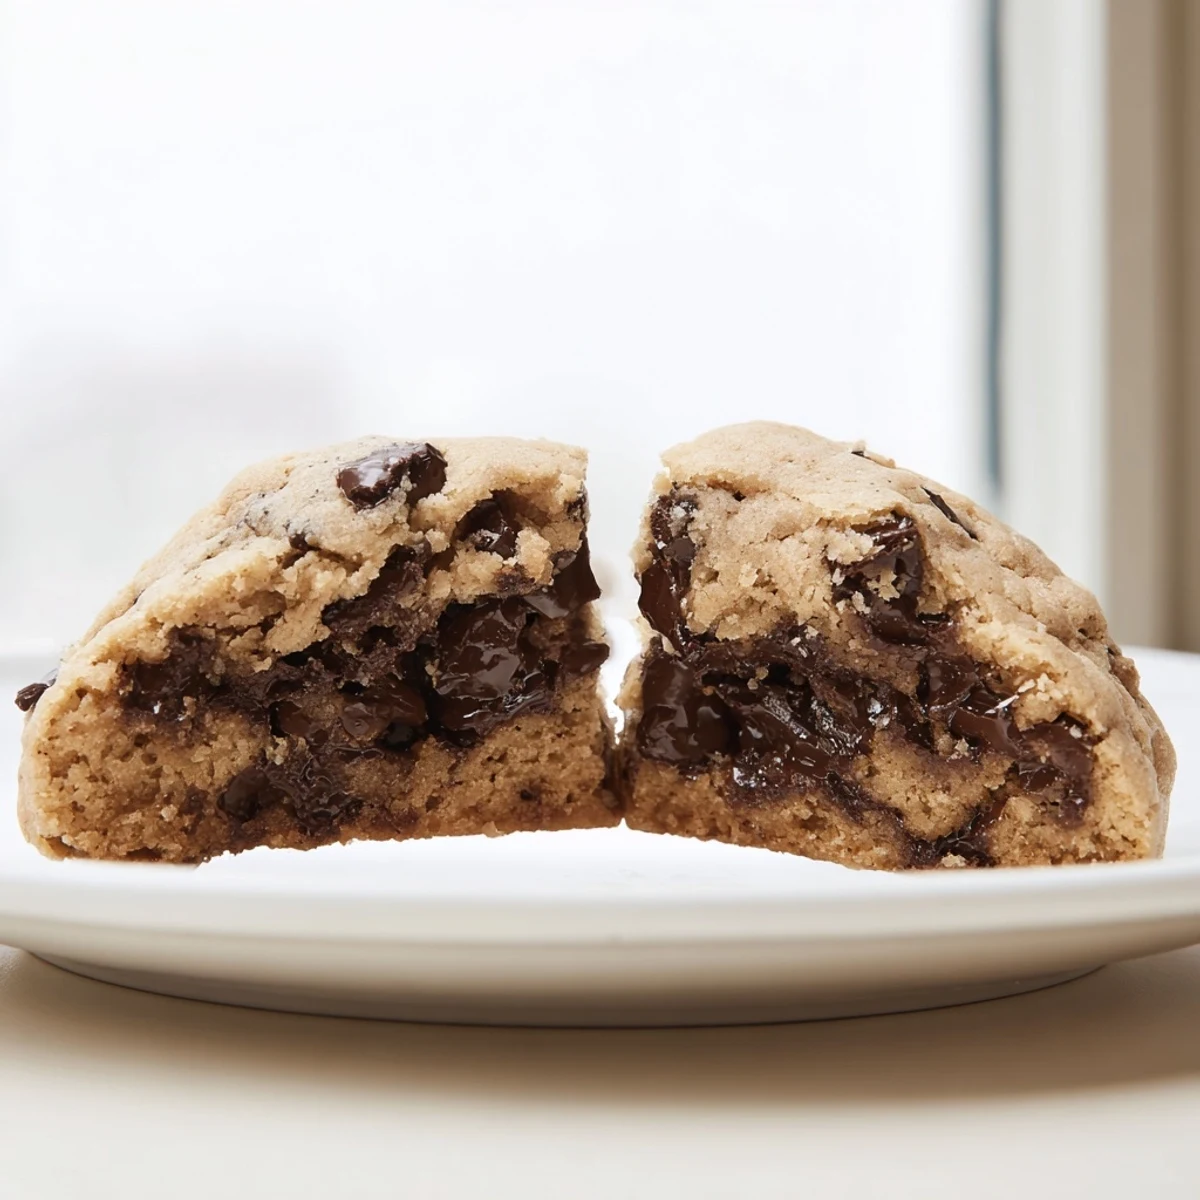
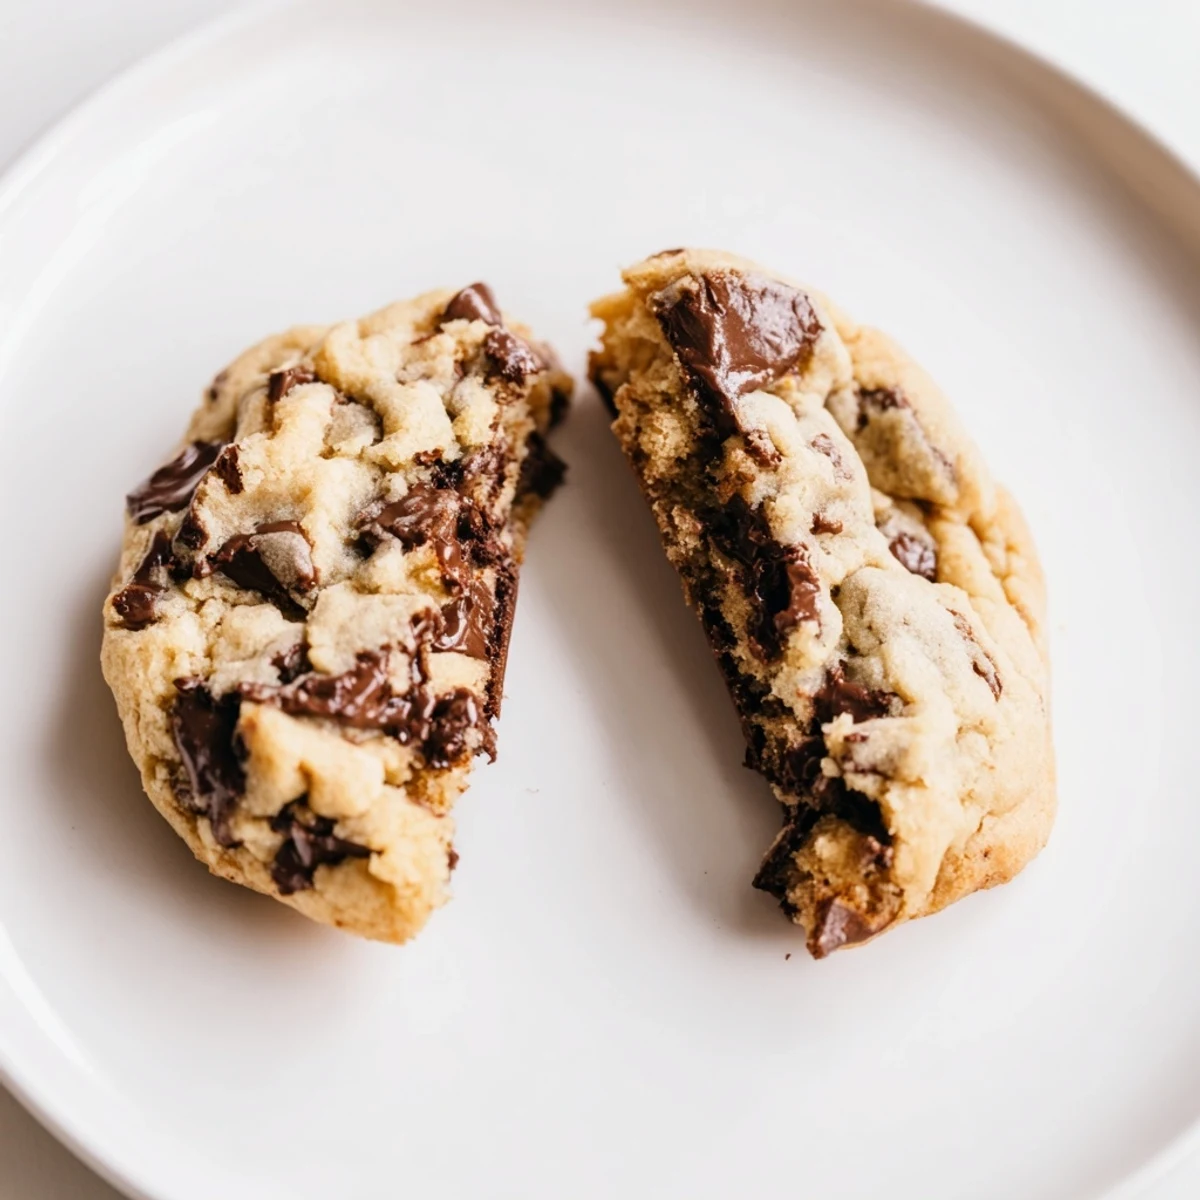
Save These classic chocolate chip cookies offer a perfect balance of chewy texture and rich chocolate flavor. Made with simple ingredients like flour, butter, sugars, eggs, and semi-sweet chocolate chips, they bake to golden edges while remaining soft inside. Pair them with a cold glass of milk for a nostalgic treat ideal for any time of day. Optionally, chilling the dough enhances flavor, and nuts can add delightful crunch.
There's something almost magical about the smell of butter and brown sugar hitting a hot oven—it fills a kitchen with a warmth that has nothing to do with temperature. I learned to make these cookies not from a recipe book but from watching my grandmother work, noticing how she'd cream the butter until it looked like pale clouds and never, ever rushed the cooling step. Now, whenever I pull a batch from the oven, I'm transported back to that moment, and I realize why she always made extra dough.
I once made these for my neighbor after she had helped us move, and I remember her eyes lighting up when she bit into one still warm from the rack. She claimed it was the best cookie she'd ever had, though I suspect it was more about the moment than my baking skills. That's when I understood these aren't just treats—they're small gestures that somehow say everything you can't quite put into words.
Ingredients
- All-purpose flour (2 1/4 cups): The foundation that gives these cookies structure without making them tough; measure by spooning into your cup rather than scooping directly from the bag.
- Baking soda (1/2 teaspoon): This tiny amount is your secret weapon for that slightly chewy, brownie-like texture that makes people ask for your recipe.
- Salt (1/2 teaspoon): Never skip this even though it seems insignificant; it amplifies the chocolate flavor in the most subtle, important way.
- Unsalted butter (1 cup, softened): Room temperature is non-negotiable here—cold butter won't cream properly and warm butter makes greasy cookies.
- Granulated sugar (3/4 cup): This creates lift and helps cookies spread; brown sugar alone would make them dense.
- Packed brown sugar (3/4 cup): The molasses in brown sugar is what gives these their color, depth, and that signature chewiness.
- Large eggs (2): Room temperature eggs incorporate more smoothly and create a better texture than cold ones straight from the fridge.
- Vanilla extract (2 teaspoons): Use real vanilla if you can; it transforms the entire flavor profile from good to unforgettable.
- Semi-sweet chocolate chips (2 cups): These are the star—resist the urge to use chocolate chips from the back of your pantry that have been there since last year.
- Cold whole milk (4 cups to serve): The pairing that completes the experience; whole milk tastes richer and somehow makes the cookies taste better too.
Instructions
- Get your oven ready:
- Preheat to 350°F and line your baking sheets with parchment paper now, before you start mixing anything. This way you won't be scrambling when your dough is ready to bake.
- Combine the dry team:
- Whisk together your flour, baking soda, and salt in a bowl and set it aside. This simple step ensures the leavening is evenly distributed, which makes a real difference in how your cookies rise.
- Cream the butter and sugars:
- Beat the softened butter with both sugars for about two minutes until the mixture looks pale and fluffy, almost like frosting. You'll know it's right when you lift the mixer and the mixture falls in soft ribbons.
- Add eggs and vanilla:
- Beat in one egg at a time, waiting a moment between additions, then pour in your vanilla. The mixture should look smooth and slightly thick, not separated or curdled.
- Bring it together:
- Gradually add your dry ingredients to the wet mixture, stirring just until you don't see flour streaks anymore. Overmixing at this point develops gluten and makes tough cookies.
- Fold in the chocolate:
- Use a spatula or wooden spoon to gently fold in your chocolate chips until they're evenly distributed. There's something satisfying about this step, and you can almost taste what's coming.
- Shape and space:
- Scoop heaping tablespoons of dough onto your prepared sheets, leaving about two inches between each cookie so they have room to spread. A cookie scoop makes this faster and more uniform.
- Bake to golden perfection:
- Bake for 10 to 12 minutes, until the edges are golden brown but the centers still look slightly underdone. This is the moment that requires faith—they'll continue cooking on the pan after they come out.
- Cool with patience:
- Leave the cookies on the baking sheet for five minutes to set up, then transfer them to a wire rack to cool completely. Eating them too soon will burn your mouth, though I won't judge you if you try anyway.
- Serve and savor:
- Pair each cookie with a cold glass of milk and enjoy the moment. This combination is timeless for a reason.
 Save
Save There was an afternoon when my daughter helped me scoop the dough, and she insisted on arranging the cookies in perfect rows instead of random scattered placement. We laughed about her precision when they baked unevenly anyway, yet somehow that batch tasted like pure joy. That's when I realized the recipe is just the starting point—the real magic happens in the shared moments and small imperfections.
The Science of Chewiness
The combination of brown sugar and the specific baking time creates that perfect textural balance between crispy edges and chewy centers that people crave. The brown sugar's molasses content adds moisture, while the slightly underdone centers continue setting as they cool, trapping steam and softness inside. Understanding this prevents the mistake of baking too long, which turns everything hard and turns a great cookie into an overcooked disappointment.
Customization Without Losing Magic
While these cookies shine in their classic form, small changes can turn them into something uniquely yours. Dark chocolate chips create a less sweet, more sophisticated version, while milk chocolate makes them taste like childhood nostalgia. Nuts add crunch and depth, but some people skip them entirely—there's no wrong answer, only your answer.
Storage and Second-Day Magic
Store your cooled cookies in an airtight container at room temperature, where they'll last up to five days though they rarely last that long. A slice of bread tucked into the container keeps them soft by absorbing excess air and moisture. Honestly, the best time to eat them is right from the cooling rack with cold milk, but day-old cookies dunked in warm coffee hit differently on a quiet morning.
- Keep an airtight container handy so these don't go stale after a few hours.
- A small piece of bread in the container acts as a humidifier and keeps cookies chewy.
- Frozen dough scoops bake beautifully from frozen—just add a minute or two to the baking time.
 Save
Save These cookies have taught me that sometimes the simplest things are worth perfecting. There's comfort in knowing exactly what to expect when you bite into something warm and familiar, and there's joy in sharing it with people you care about.
Questions & Answers
- → What is the best way to get chewy cookies?
-
Use a combination of brown and granulated sugars and avoid overbaking to keep the centers soft and chewy.
- → Can I substitute chocolate chips with other types?
-
Semi-sweet chips are traditional, but you can swap with milk or dark chocolate chips according to your preference.
- → Is chilling the dough necessary?
-
Chilling the dough for 30 minutes enhances the flavor and helps prevent spreading during baking.
- → How should cookies be stored to maintain freshness?
-
Store cookies in an airtight container at room temperature for up to five days to retain softness.
- → What tools are helpful for preparing these cookies?
-
Using mixing bowls, an electric mixer or whisk, measuring cups, baking sheets lined with parchment, and a cookie scoop will streamline preparation.
