 Save
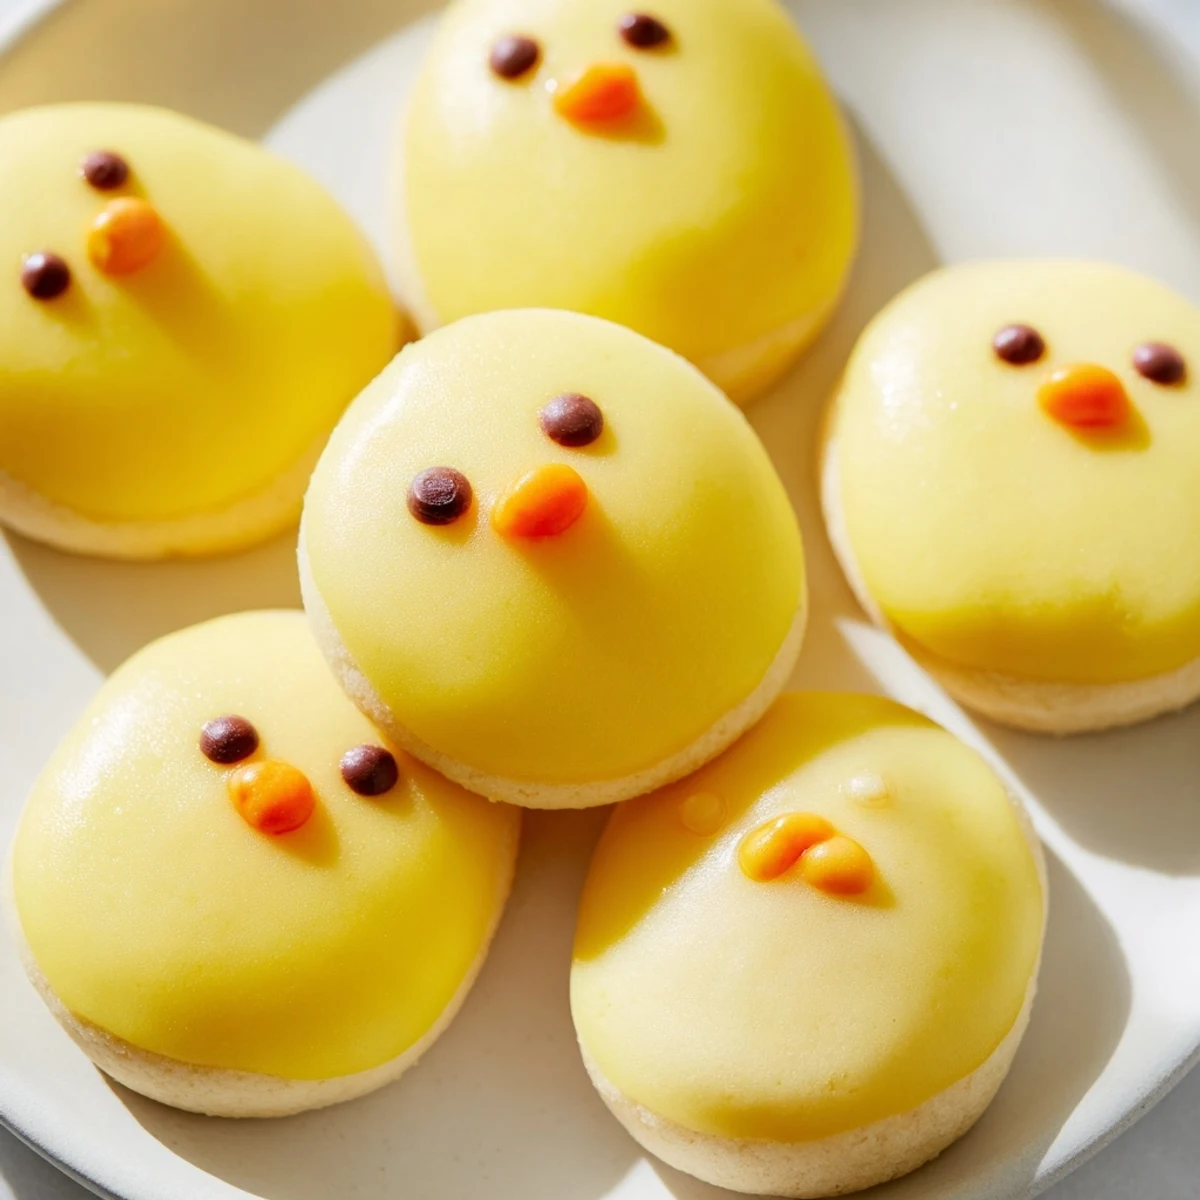
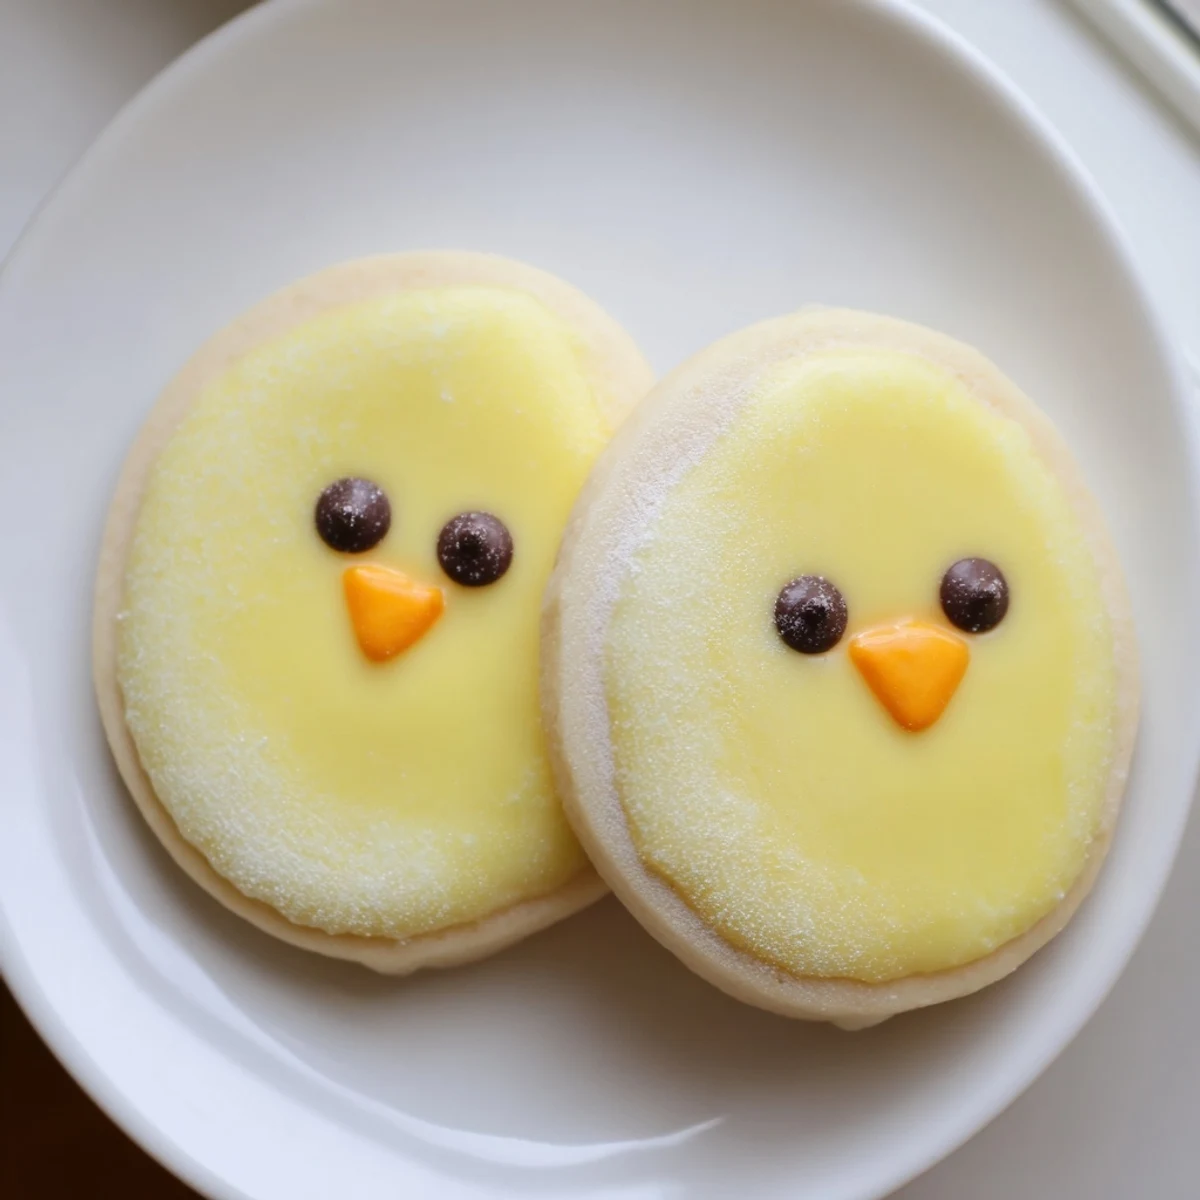
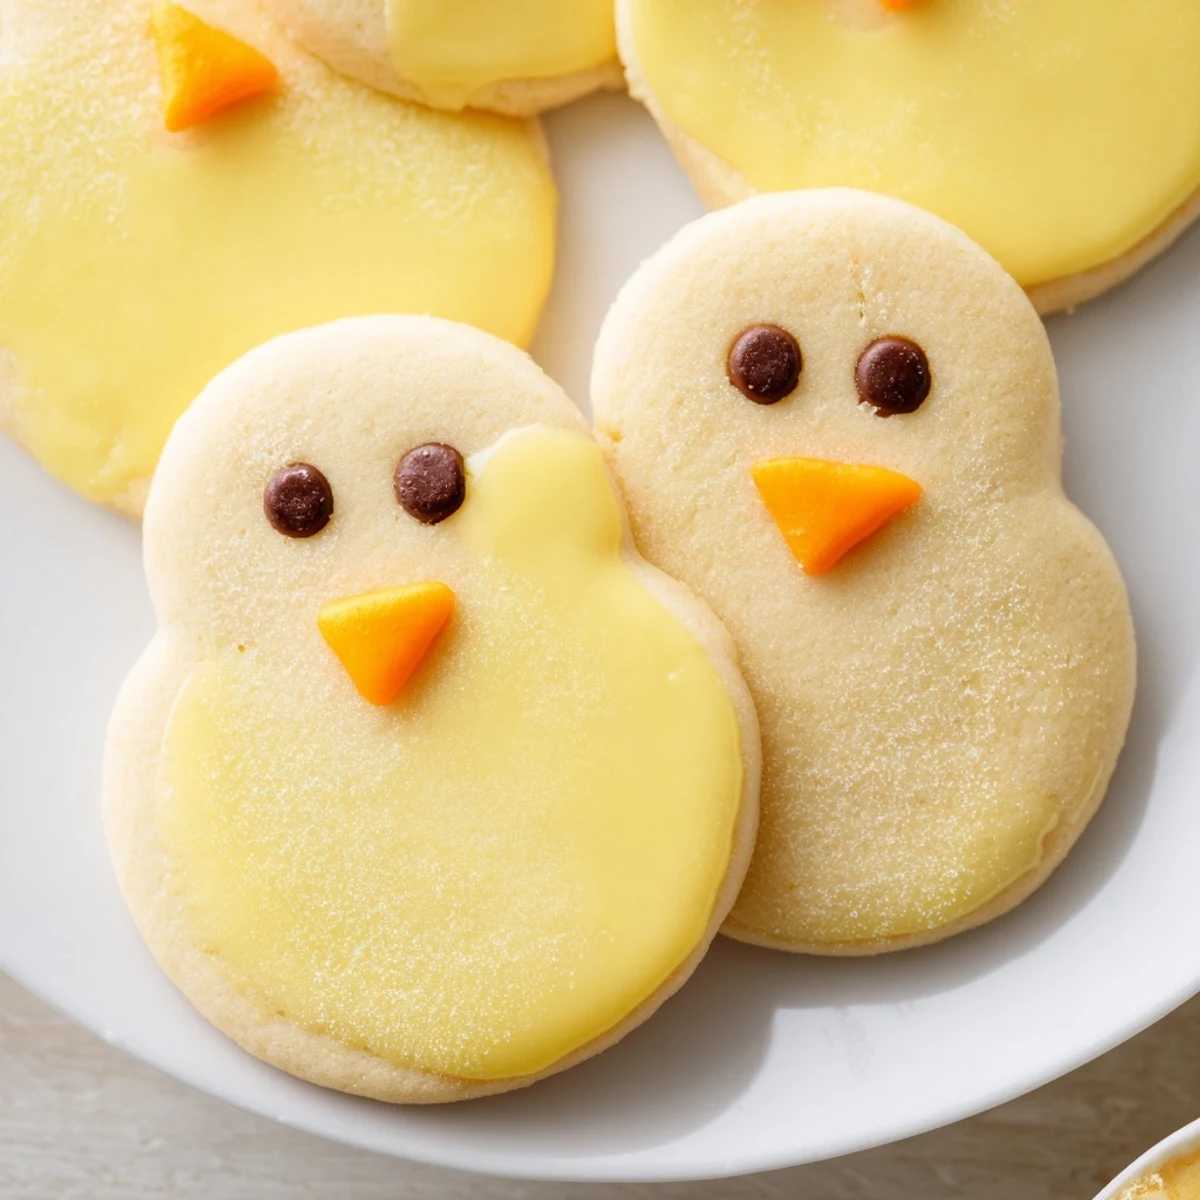
Save These charming chick-shaped cookies combine classic buttery sugar cookie dough with vibrant yellow coloring and playful faces. The soft, tender texture comes from creamed butter and sugar, while the cheerful chick design makes them irresistible for spring gatherings, Easter baskets, and children's parties.
Each cookie features a rounded body with a smaller head portion, creating that quintessential chick silhouette. The decoration process is wonderfully simple—just add eyes with black gel or chocolate chips and beaks with orange candy or gel. A thin powdered sugar glaze adds professional-looking shine and extra sweetness.
The dough comes together quickly and can be chilled if too soft to handle. For added flair, incorporate lemon zest or roll edges in colored sprinkles before baking. These freeze beautifully undecorated, making them perfect for advance prep.
The kitchen filled with tiny giggles as my niece pressed chocolate chips onto the yellow cookie faces, declaring this one had a crooked beak and that one was giving her side eye. These chick cookies weren't just dessert anymore, they were little personalities we were creating together. Spring suddenly felt more vibrant with a platter of these buttery, cheerful treats on the counter, and I realized the decoration time is really bonding time in disguise.
Last Easter, my neighbor's daughter proclaimed the chick with three eyes her favorite because it was special, and honestly, she was onto something. The imperfect ones somehow become the most memorable, each tiny cookie carrying the fingerprint of whoever made it. Now I make them every spring, sometimes leaving a few deliberately quirky.
Ingredients
- All-purpose flour: The backbone that gives these cookies structure while keeping them tender
- Baking powder: Just enough lift so they hold their chick shape without spreading into blobs
- Unsalted butter: Room temperature is nonnegotiable here for that creamy, easily mixable base
- Granulated sugar: Sweetens while creaming into butter for that perfect melt in your mouth texture
- Large egg: Binds everything together while adding richness
- Vanilla extract: Pure extract worth the splurge for that warm, comforting background note
- Yellow food coloring: Gel coloring gives the most vibrant yellow without thinning your dough
- Powdered sugar and milk: The simplest glaze that adds professional looking shine
- Black and orange decorating gels or chocolates: Transforming plain cookies into actual characters
Instructions
- Get your oven ready:
- Preheat to 350°F and line those baking sheets with parchment paper now, so you are not scrambling later
- Whisk the dry team:
- Combine flour, baking powder and salt in a bowl, whisking until everything is evenly distributed
- Cream the butter and sugar:
- Beat together until pale and fluffy, those air pockets are what make cookies tender
- Add the egg and vanilla:
- Mix until completely incorporated, scraping down the bowl so no lonely butter pockets remain
- Bring it all together:
- Gradually stir in the dry ingredients until a smooth dough forms, do not overwork it
- Color it cheerful:
- Add yellow food coloring drop by drop, kneading until you have that perfect spring shade throughout
- Shape your chicks:
- Roll a 1 inch ball for the body, press a slightly smaller ball on top for the head, and gently seal them together
- Bake until just golden:
- Give them 8 to 10 minutes, watching for that moment when edges barely start to color
- Let them cool completely:
- Rushing this step means melted decorations, so let those chicks rest and firm up on the baking sheet
- Give them personality:
- Brush with glaze if you want extra shine, then add eyes and beaks, creating tiny faces that make everyone smile
 Save
Save My mom now keeps a small container of chick cookies in her freezer, pulling out one or two when she needs a cheerful moment. They have become her go to for when grandkids visit or just when spring feels too far away. Something about those tiny faces makes even ordinary Tuesday afternoons feel special.
Making Them With Kids
Letting children shape the chicks means accepting that some will look more like blobs than birds, and that is absolutely part of the charm. My niece has graduated from smashing the dough to carefully placing the eyes, though she still insists each chick needs a unique personality quirk. The pride they feel pointing out their creation is worth every sprinkle on the floor.
Decoration Freedom
Sometimes I skip the glaze entirely and brush the warm cookies with a little melted butter, then roll them in colored sugar for sparkle. The decorating gels are forgiving since you can wipe off mistakes, but mini chocolate chips pressed into soft dough give the most adorable wide eyed look. I have even seen coconut wings added for extra fluffiness.
Storage And Sharing
These cookies actually improve after a day in an airtight container as the flavors meld and the texture becomes perfectly soft. I have shipped them across the country wrapped in parchment and tucked into tissue paper, arriving surprisingly intact. The glaze helps seal in freshness, so decorated cookies stay fresh longer than you would expect.
- Stack between parchment layers so faces do not stick together
- Freeze undecorated dough balls for quick fresh baked treats later
- Package in clear bags tied with pastel ribbon for the sweetest gifts
 Save
Save There is something impossibly joyful about a plate of these bright little faces looking up at you, promising sweetness and spring all at once. Happy baking, and may your chicks be charmingly imperfect.
Questions & Answers
- → Can I make the chick cookie dough ahead of time?
-
Yes, the dough refrigerates well for up to 3 days when wrapped tightly. You can also freeze it for up to 3 months—just thaw overnight in the refrigerator before rolling and shaping.
- → What's the best way to get even yellow coloring?
-
Add yellow food coloring drop by drop, kneading thoroughly after each addition. Gel coloring works best as it doesn't thin the dough. Start with less than you think—you can always add more.
- → How do I prevent the chick shapes from losing definition while baking?
-
Chill the shaped cookies for 10-15 minutes before baking. This helps them hold their shape. Also avoid overbaking—remove when edges are just barely golden.
- → Can I use royal icing instead of the simple glaze?
-
Absolutely! Royal icing creates a smooth, matte finish and dries hard for stacking. Pipe it around the edges first, then flood the center. Let dry completely before adding facial details.
- → What other spring shapes work with this dough?
-
This versatile dough works beautifully for bunnies, eggs, flowers, or butterflies. The same yellow coloring and decoration techniques apply, making it perfect for any spring theme.
- → How should I store decorated chick cookies?
-
Store in a single layer in an airtight container at room temperature for up to 5 days. If stacking, place parchment paper between layers. The gel eyes may smudge if stacked too soon.
